Pages

Showing posts with label Printmaking. Show all posts

Friday, April 29, 2011

Printmaking Zoo Shirts


Every year our first grade classes study habitats and animals.  After all of the studying, they have an opportunity to go to the zoo and see the animals up close in their habitats. 

In the art classroom, we create Zoo Shirts using the printmaking technique of stamping. 

The children love this project and are so excited to create their shirts.  On the day they visit the zoo, they all wear their shirts.


To make the shirts you will need the following materials:
Acrylic paint (or fabric paint-something that is permanent)
Paint brushes (various sizes)
Stamps (home made or purchased)
Styrofoam trays or egg cartons for the paint
Aprons or art shirts to protect clothing
T-shirt forms to put between the shirt and protect the other side


Here is how we make our shirts:

1. I place each shirt on a t-shirt form to help make the printing easier for the students.  If you don't have a t-shirt form use a heavy piece of oak tag, poster-board or cardboard.

2. I demonstrate for the students how to paint the surface of the stamp with the acrylic paint.  We talk about having the right amount of paint on the stamp so that we get a good print.  Too much paint or too little and it won't turn out well.  We agree that a nice even coat of paint with out drips works the best.


3. Next you can actually print the stamp on the shirt.  Find the right spot for your stamp and gently press down on the shirt being careful not to move it.


4. Off to the next stamp and the next colors. Repeat.


5. To stamp the other side of the shirt you will need to allow the first side to dry.  Then you can do it all over again on the other side.

6. Proudly wear your shirt and go visit the zoo!

Please note, if you use acrylic paint or permanent fabric paint you can wash your shirt as normal.

Friday, April 8, 2011

Mono-types


My 3rd grade students had a blast learning about mono-types

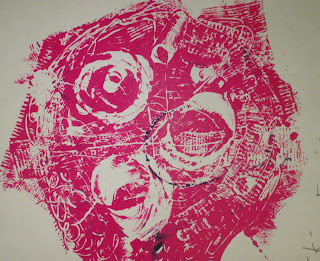
A mono-type is a print made by manipulating ink.  It cannot be an edition because there is no part that can be reproduced exactly.  Each print is unique. This process allows for experimentation and drawing directly into the ink or paint with tools or objects.

Materials:
Plexiglas or a metal plate various sizes (mine are 10 x 10 inches)
brayer
printer's ink-water based is best for easy clean up
found objects such as marker lids, bubble wrap, pieces of mat board or cardboard, think string, toothbrushes, Popsicle sticks, etc
Paper about two inches larger than the Plexiglas

How to make your print:
1. Squeeze out a bit of ink on to the plate.
2. Use the BRAYER to spread the ink out.
3. Manipulate the ink with the found objects.
4. Lay a clean sheet of paper on the ink and gently rub to transfer the image to the paper.
5. Remove the paper and admire your work!
6. Allow to dry then sign your master piece.
7. Feel free to use oil pastels or colored pencils to add more color and design to your dry piece.

For more information about Mono-prints and Mono-types please visit the following site:
http://www.monoprints.com/info/monoprints.html


Friday, February 4, 2011

Linoleum Relief Prints


Linoleum Relief Prints


My 6th grade students are learning about PRINTMAKING.  We are creating prints using linoleum.  This is always a popular project with my students.

During our first class, I talk about printmaking and show various examples.  The students see the entire process: drawing, transferring the image to the linoleum, carving and pulling prints.

The students spend the rest of the first class working on their drawings.  During the next class they transfer their image and begin carving the linoleum.  They then have two classes to pull prints. 

Here are some of the finished pieces:


More to come....


Tuesday, October 5, 2010

Gyotaku Prints


Gyotaku Prints

Another of my favorites....I know I say they are all my favorites!
Fish printing is always a great way to introduce PRINTMAKING to students.  They love the idea that you can take something from nature and make art from it.  They love that it is something they can do at home with minimal supplies and materials.  And they think it is hilarious that the fish smell fishy! 

So in my classroom we use rubber fish.  Rubber fish are safe and not so smelly ;) 
We also do bubble prints.  These are fun and always unique. 

Here are the materials you will need for the fish prints:
Rubber fish or real fish
Paints
Brushes
Paper-drawing paper or rice paper
Paper towels

For the bubble prints you will need:
Containers to mix the paint, water and soap
Straws (one per person)
Water
Tempera Paint
Soap or Bubbles
Spoons for stirring

How to Make Your Prints:

I usually have one group of students work on making the Gyotaku prints while the others begin their bubble prints.  I set out the bubbles at each table-usually 2 different colors. I call one table at a time to do the fish prints.  I set up one table as the fish printing table and the students can select the fish they would like to use.  Once they print it they can go back and make bubble prints. 

For the prints you see in the photos here we only used black ink for the fish. 
This year we are going to use a variety of colors and I'm going to try this entire lesson in a different way. 
I will post those photos later for comparison!